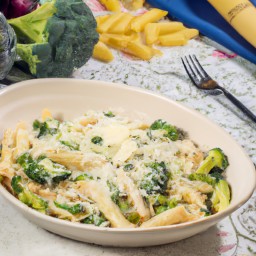
This creamy veggie pasta is an Italian dinner made of penne, broccolis, snow peas, zucchinis and flavorful cream cheese and parmesan – perfect for those who are eggs-free, nuts-free or soy-free.
Special diets: Vegetarian | eggs-free | nuts-free | soy-free |
️Allergens: not vegan | gluten | lactose |
⏱ 34 mins – easy
🍽 4 servings – 554 kcal per serving
| Serving
315g |
Fat
18g |
Sat. fat
8g |
Sodium
3799mg |
| Carbs
76g |
Fibers
5g |
Sugars
7g |
Proteins
22g |
INGREDIENTS
- 1 tsp black pepper
- 2 tbsp salt
- 12 oz penne pasta
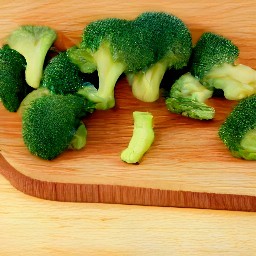
- 5 oz broccoli
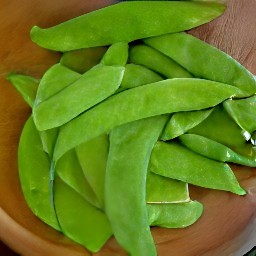
- 4 oz snow peas
- 2 zucchinis
- 1 tbsp olive oil
- 4 oz cream cheese
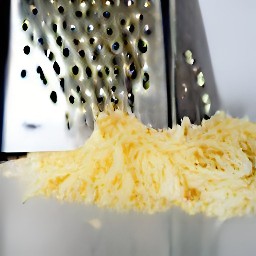
- 2 oz parmesan cheese
- 1 lemon
- 1 handful basil
TOOLS
- 1 knife
- 1 grater
- 1 colander
- 1 cup
- 1 zester
- 1 squeezer
- 1 saucepan
- 1 lid
- 1 non-stick frying pan
- 1 wooden spoon
STEPS
Cut broccolis into florets, then dice zucchini.

Shred parmesan cheese with a grater.
Peel snow peas.
Zest a lemon.

Squeeze the zested lemon with a squeezer.

Heat 15 cups of water in a saucepan for 4 minutes.

Add salt and penne pasta to the boiling water.
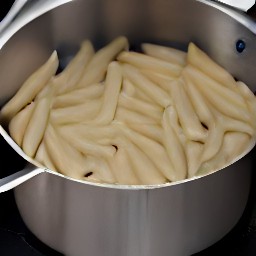
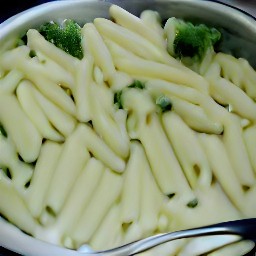
Cover the saucepan with a lid and cook for 6 minutes, then remove the lid. Add broccoli florets and snow peas, then cover the saucepan again. Cook for 3 minutes, then turn off the heat and remove the lid.
Transfer 6 tbsp of cooking water to a cup.

Drain pasta, broccoli, and snow peas in a colander.
Heat olive oil in a non-stick frying pan. Add zucchini and cook for 8 minutes, then add a cup of cooking water. Stir in cream cheese, lemon zest, and half of the lemon juice with a wooden spoon for 2 minutes to get a creamy sauce.

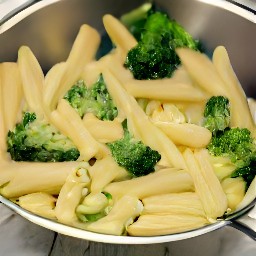
Transfer the pasta, broccoli, and peas to the creamy sauce.
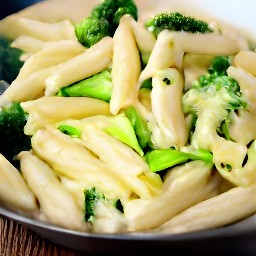
Stir the pasta with a wooden spoon for 2 minutes, then add lemon juice, basil, 0.7 oz of the grated parmesan cheese, 1 tsp of black pepper, and 1 tsp of salt to the frying pan to get a creamy veggie pasta.
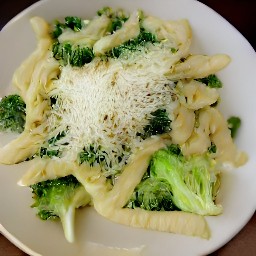
It’s ready to be served !